This is an old revision of the document!
Table of Contents
Messages
Communication with people working for your company is a crucial thing to make everything work smoothly.
By using a panel Messages situated in the top-right corner of the main screen, you can send instant messages to i.e. cockpit-crew or cabin-crew members with some last-minute update-information regarding changes in their duties. Or you can use this section to inform your sales team about changes regarding pricing of offered flights.
Inbox

You can organise viewing your messages by using filtering options, such as: Tag, From, Subject or Date.
Once you have received a new message, Leon will change the colour of a white envelope next to the icon to orange ![]()
The red dot, visible before the 'From' column, informs that the sender has required you to familiarise with the message. When you click on the message itself, Leon will show this warning:
Sender of this message requested You to confirm familiarisation with its content. To confirm familiarisation click here which, after cliking on it, will bring up a pop-up window:

Once you have read the message, the red dot becomes green and bold text changes to normal.
To delete message simply press ![]() button and confirm by pressing OK in a pop-up window.
button and confirm by pressing OK in a pop-up window.
New Message
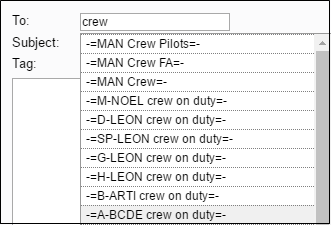
In order to send a new message click on 'New Message' field and type first letters of his name, surname, code or position. Leon will display a list of suggested contacts. Names in brackets are labels from 'Phonebook' menu. Selecting this kind of recipient allows you to send 1 message to all users assigned to the particular label.
On the example below you can see that after typing 'crew' all suggestions showed up: crew-pilots, crew-FA, all crew in general as well as crew assigned to particular airplanes. By choosing i.e. 'crew pilots' the only recipients of the new message will pilots. To delete mistakenly added recipient, simply click on its name.
Having selected recipient, add subject of the message and a tag (read more about tags in a separate chapter below). Apart from a text you can also upload attachments - pdf, jpg, jpeg, doc, docx and gif formats below 2 MB are available.
If you wish the recipient to familiarise with your message, tick the box 'Request recipients to confirm familiarisation with this message'. If the message does not need to be replied, tick the box 'Disable possibility to reply to this message'.
Outbox

'Outbox' is simply a list of all messages sent out by yourself. You can use the filter to view the list the way you want. You can also check if recipients have confirmed the familiarisation with the messages you sent to them.
Red dot in the 1st column means that not all recipients have confirmed the familiarisation with the message. To find out who has not confirmed it yet, click on the particular message and then on the link 'Click, to show/hide confirmations'. This will bring up a list of all recipients - here you will find information who has read/confirmed your message and who has not done it.
Tags
Click 'Tags' to add/edit tags for messages. When the new window appears on the screen, enter the name of the new tag and add it to the system or delete the existing tag by clicking its name on the list.

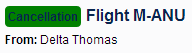
When sending out an urgent message (i.e. about the flight cancellation), you can use a tag 'Urgent' or 'Cancellation' so that the message can be highlighted, when read by the recipients (example below).