Table of Contents
TABLE
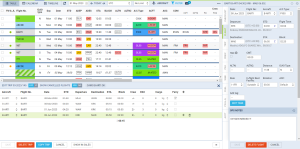
The philosophy of working in the section Table is to use filters to display desired activities in the middle section of the screen and then modify selected properties of those activities using the right-hand panel. Date range and format of displayed information can be altered using the top bar. By clicking TODAY Leon shows current day activities as well as other days.
You can select a number of days for flights view in the drop-down box (top-right corner of the screen), or leave as 'No Limit' to see as many flights as the screen can fit.
The refresh screen icon can be used for manual page refreshing, although Leon refreshes the screen every 2 minutes itself.
You can view flights and positionings duties. Legs of the same trip are marked with the thick, blue line. Positioning duties added from a section Crew > Duties (selected from the bottom of the duties list) also appear in Table. If there is a note inserted (in Crew > Duties), then those duties appear on white background as ![]()
When adding Positioning duty from Table, it is possible to add it as an option - it will appear in stripes (see screenshot on the right).
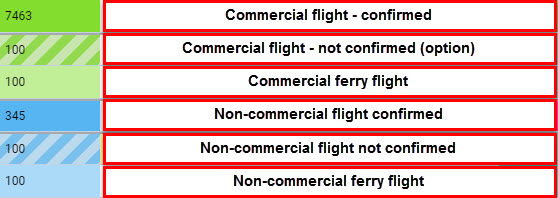
Leon will display type of flight by marking Flight no. column with the relevant colour. When you hover the mouse over the flight number Leon will show notes inserted into a tab FLIGHT (both: OPS & SALES).
You will also see Aircraft colour in ACFT column - the colour can be defined in a section Settings > Fleet.
If the flight is added as Ambulance, Cargo, Simulator or Training type, these types will display in the PAX column. In addition, Ambulance type flights will display the number of PAX in brackets if passengers are added, i.e Ambulance(2) for Ambulance type flights with 2 PAX.
'Flight change' feature
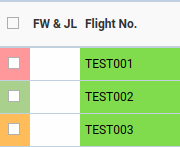
The colour coding used in that feature is explained in the table below.
| Colour | Meaning |
|---|---|
| New - the flight has been created and hasn't been acknowledged yet | |
| Acknowledged - the flight is acknowledged and there are no new changes | |
| Changed - the flight was acknowledged already but has been changed after that |
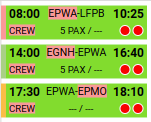
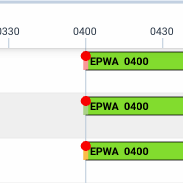
The changes which trigger the status change from 'acknowledged' to 'changed' are:
- aircraft
- flight number
- airports
- times
- crew
The feature is present in OPS Table, as well as in OPS Calendar and OPS Timeline. In the cases of OPS Calendar and OPS Timeline, the status will be indicated as a colour-coded left border of the flight.
The status can be changed to 'acknowledged' by clicking the corresponding button in the context (right-click) menu of the flight.
The button will appear only if the status is different than 'acknowledged'.
 - appears if at least one of the selected flights is 'new'
 - appears if at least one of the selected flights is 'changed', and none of them is 'new'
Filters
Aircraft
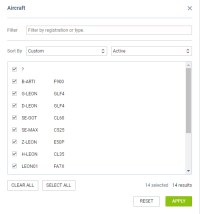
Aircraft panel allows to define for which tails Leon should show flights in a section OPS. On the options-bar click  (where circled-blue is the number of active tails) and Leon will show a new poop-up window, where you can mark/unmark particular tails.
Use 'Filter' or 'Sort by' options to chnage the order of tails in the Calendar panel. You can also chnage the order by drag & dropping the tail in the pop-up window.
'AIRCRAFT' filter presets
It is possible to create the filter presets, which are filtering templates, in the 'AIRCRAFT' filter in the OPS views.
The filter presets allow quick and easy changes to the set of filtering options depending on the requirements.
In order to create a preset the following actions need to be performed:
- select a list of aircraft within the 'AIRCRAFT' filter
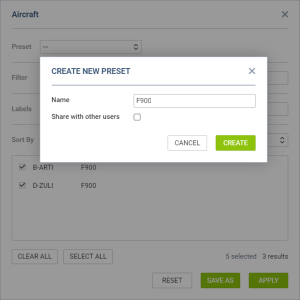
- click on the 'SAVE AS' button located in the bottom-right corner of the 'AIRCRAFT' filter pop-up window
- name the preset
- optionally, it is possible to set the preset as a global one by selecting the Share with other users option. Otherwise, the presets are considered to be private
- press the CREATE button to save the preset
Once the preset is saved it is available in the Select preset dropdown in the 'Aircraft' filter.
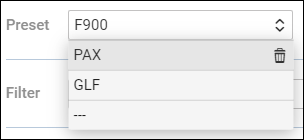
It is possible to delete the preset by clicking on the bin icon available upon hovering the mouse over the preset.
FILTER
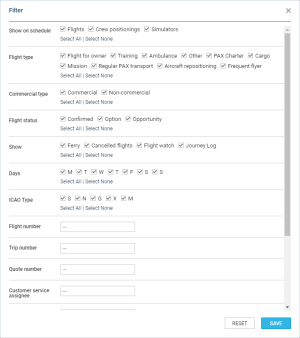
This tab is divided into several sections, such as:
- Show on schedule - select which type of activities should get displayed: flights, positionings, office.
- Flight type - select which type of flights should be displayed.
- Commercial type - option to see either 'Commercial' or 'Non-commercial' flights, or both.
- Flight status - shows confirmed and/or not confirmed flight (options), or opportunity (to sell the flight).
- Show - you can narrow your view by excluding ferry, cancelled, journey log or flight watch. Unticking the 'Journey log' filter will remove flights with journey log, full or partial, from the view. Unticking the 'Flight watch' checkbox, will remove the flights with inserted FW as long as BLON value is filled in in the FW.
- Days - select which day of the week you want activities to be displayed on the list.
- ICAO type - denotes the type of flight as follows: S for Scheduled Air Service, N for Non-scheduled Air Transport Operation, G for General Aviation, M for military flights and X for everything else.
- Flight number - search for specific a flight number.Minimum 3 characters required.
- Trip number - search by a trip number. Minimum 3 characters required.
- Quote number - search by the quote number.
- Customer service assignee - filtering by person assigned to the booked quote in the Requests/Quotes section
- Airport - allows you search for flights TO and FROM a specific Airport. Leon will suggest ICAO/IATA when you insert the name. You can also filter flights by FIR codes (i.e. EP* for all flights To/From Poland or EG* for England).
- Client - allows you to search for flights made for specific client. If you start typing Leon will suggest Client's name in the dropdown.
- Crew - searches for flights where indicated Crew member was assigned to.It also possible to filter by multiple crew members. Simply choose the crew from the Crew Member search box and once you have the list of crew click 'SEARCH' button
- Tags - allows to search for tagged flights.
- Flight log - filtering correlated with the 'Flight Log' field in the Journey Log
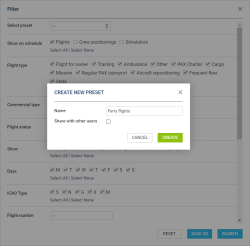
FILTER PRESETS
It is possible to create filter presets which are filtering templates.
The filter presets allow quick and easy changes to the set of filtering options depending on the requirements.
In order to create a preset the following actions need to be performed:
- select a set of filters within the 'FILTER' pop-up
- click on the 'SAVE AS' button located in the bottom-right corner of the 'FILTER'
- name the preset
- optionally, it is possible to set the preset as a global one by selecting the Share with other users option. Otherwise, the presets are considered to be private
- press the CREATE button to save the preset
Once the preset is saved it is available in the Select preset dropdown in the 'FILTER'.
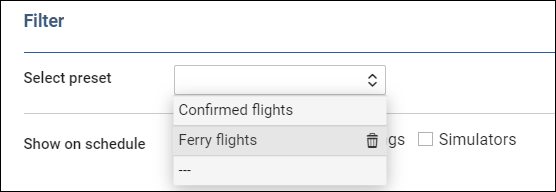
It is possible to delete the preset by clicking on the bin icon available upon hovering the mouse over the preset.
Message Center
Message Center is available in all the OPS views - Table, Calendar, and Timeline.
Message Center icon - ![]() - is located in the top bar of the view, next to the 'FILTER'.
- is located in the top bar of the view, next to the 'FILTER'.
The number indicates the number of unread messages.
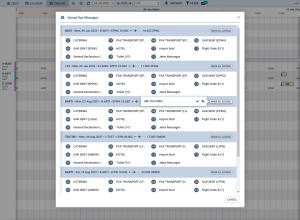
Clicking on the ![]() icon opens the Unread OPS Messages window (as per screenshot on the right).
icon opens the Unread OPS Messages window (as per screenshot on the right).
This window contains the list of flights, sorted by date from the oldest, the name of the email section and the number of unread email.
Clicking on the name of the section opens the 'Messages' section for this particular section.
It is also possible to mark all the messages as read within one flight:

Confirming it will remove the flight from the 'Message Center' list.
Due Date indication
The checklist item 'Due Date' functionality is indicated by the  icon located next to the 'Message Center' icon.
The 'Due Dates' option allows previewing the 'Request Due Date' and the 'Completion Due Date' for selected checklist items at selected airports.
More information on the configuration and the functionality can be found here.
3-dot FILTER
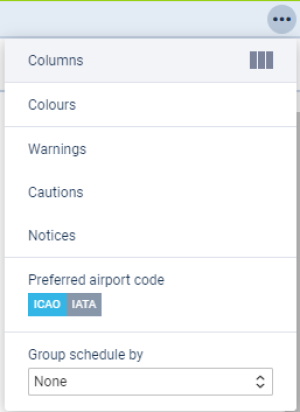
Each Leon user can define his own view of the schedule list. It is possible to add or remove columns, decide if ACFT or Flight number should appear with a colour, if Leon should show any warnings, cautions or notices and to define preferred airport code as well as timezone.
The 3-dot filter is located in the top-right corner of the OPS view.
It contains the following filtering options:
- Columns - option to select the columns available in the main TABLE view
- Colours - allows selecting the colours applicable in the main view:
- Flight type colours - indicates whether the flight is commercial (green colour) or non-commercial (blue colour), has the JL filled in (grey colour) in the 'Flight No.' column
- Aircraft colours - indicates the aircraft colour (set up in the aircraft settings > OPS tab) in the 'ACFT' column
- Entire leg row - Leon will colour an entire row, either with the flight type colour (if the 'Aircraft colours' checkbox is left unmarked), or with an aircraft colour (if the 'Aircraft colours' checkbox is marked). If both checkboxes (Flight type & Aircraft colours) are marked - Leon will show an aircraft colours as this colour has priority over flight type one.
- Dim ferry legs - Ferry flights will be dimmed (lighter colour)
- Warnings - all warnings in Leon are displayed in red. Here, you can mark particular (or all) checkboxes and if i.e.:PAX passport is expired, crew FTL violated or crew endorsement is expired - Leon will show PAX number value in red
 just like crew codes. User can hover the mouse over the alerted item to see details.
 - Preferred airport code - Switch between ICAO & IATA airport codes to be displayed in the OPS section (Table, Calendar or Timeline).
- * Group schedule by - there are 3 ways you can group flights in the table view:
- None - flights will not be grouped and the order they will be sorted by STD
- Day and registration - all flights are grouped by aircraft registration and then sorted by STD
- Day and trip - all flights are grouped by trip number and then sorted by STD (typical OPS setting)
Editing trip
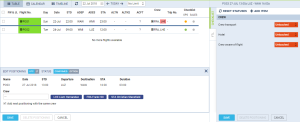
If you click ![]() button at the bottom of the screen an additional panel will show up.
button at the bottom of the screen an additional panel will show up.
If the selected activity is a flight, the whole trip (series of flights) will open in the bottom window with the selected leg in shaded green.
You can edit each column (Flight No., Date, STD/STA or PAX) and modify it. STA field will show an estimated time of arrival based on GCD and the aircraft perfprmance data inserted in its profile (which can be defined in a Fleet section), GCD including winds, archived flights (min. 5 on the same route) and Route Finder.
Quote number shows right before UTC/LT switcher:


You can also add a new leg in this section by clicking + or delete a leg by clicking![]()
While you are editing a trip in the bottom panel, you can still use the right properties panel to access given sector details and modify them.
Apart from the standard schedule information, the bottom EDIT TRIP panel also shows 'Crew' column. This column has A/B format where 'A' indicates a number of cockpit crew and 'B' stands for cabin crew, e.g. 2/1 means 2 cockpit and 1 cabin. If there is no crew assigned Leon will mark it with '-' (2/- for no cabin crew). If you hover the mouse over the 'Crew' number indication Leon will display Crew codes assigned to the flight.
An additional option in Editing Trip panel is possibility of entering Cargo value. Switch to Cargo or PAX & Cargo in Settings > Flight Editing section in Trip edit scheme drop-down.
Leon will mark a cargo flight as 'Ferry' only if both 'PAX' and 'Cargo' are set to '0' in trip edition panel.
Positionings
The transferring of a non-operating crew member from one place to another, at the behest of the operator, is an important thing in aviation industry. In Leon you can add positioning duties and assign crew in 2 easy ways.
Positionings in OPS
You can add Positioning by clicking ![]() button at the bottom of Schedule view.
button at the bottom of Schedule view.
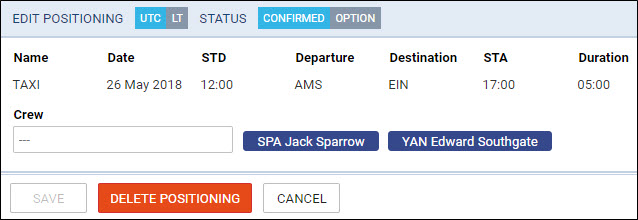
When a new window shows, enter details such as:Name, Date, STD, Departure, Destination and STA. Duration will calculate itself.
Clicking on Crew field allows you to select designated crew member from a drop-down box, or type-in his/her name or a code.
When adding Positioning duty from Table, it is possible to add it as an Option - it will appear in stripes, as all options in Leon.
Positioning duties added from a section Crew > Duties (selected from the bottom of the duties list) also appear in Table. If there is a note inserted (in Crew > Duties), then those duties appear on white background as ![]()
The right-hand filter contains 3 tabs:
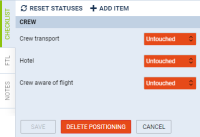
- Checklist - default items are: Crew aware of flight, crew transport & hotel. You can manually add more items by clicking a button ADD ITEM.
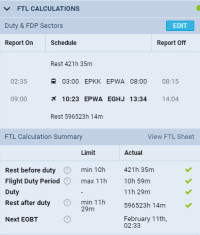
- FTL - FTL Calculation Summary showing most important FTL regulations displayed in 2 columns: Limit & Actual.
- Notes - an option to insert relevant notes for the particular positioning.
Multiple Positioning sectors
![]() function has an option to add more than one Positioning sectors for the crew.
function has an option to add more than one Positioning sectors for the crew.
To add multiple Positioning sectors you have to:
- Click on 'NEW POSITIONING' button and start inserting the details of the positioning as you normally would, including the crew.
- Click 'SAVE' to finish the process of adding the first Positioning sector. Leon will save the first sector and automatically populate the 'NEW POSITIONING' entry for the following sector with the existing Crew assigned. You can add or remove Crew at any time. The checklist on each new Positioning will reset to

In order to save the last Positioning, untick the checkbox and click on 'SAVE'. If the last Positioning has already been added and the “NEW POSITIONING' window populated, just click on 'CANCEL'.
Simulators
To add a new Simulator as the plan, click on  button. Once a pop-up window shows, fill it in with details such as Aircraft type, Date, ADEP, ADES, BLOFF, BLON. Information inserted in the 'Place' field will display in the 'Flight No' column in the OPS view.
Additionally, it is possible to change the default reporting times in the 'Report on' and 'Report off' fields.
Initially, it is possible to add a SIM session without having to insert the crew as long as no Journey Log fields are filled in. Once the JL field is filled in, at least one crew has to be assigned.
Crew positions which can be added to SIM duty are CPT, FO, LTC, TRI, TRE, FE, FE2.
'Night T/O', 'Night LDG', 'Approach' and 'Approach type' fields will show only if these fields are activated in 'Flight editing' > 'Journey Log Items' section. When editing an existing Simulator session, these fields will show only if they were previously applied.

Once the SIM duty is done you can add details: T/O, LDG, Landings, Pilot Flying, Approach and Notes and Leon will show SIM duty in OPS with the grey colour indication and green dot.

In order to edit the Simulator, you need to click on it and the pop-up 'Edit Simulator' window will appear. There, you can update the relevant details and save the changes.
- Crew currency feature will work properly only when the field 'Pilot Flying' has been filled in with pilot/pilots codes. In a case where FO did take off and CPT did landing (or vice versa), you should add crew codes in a field 'Pilot Flying' as FO/CPT or CPT/FO.
- It is possible to add SIM session on a virtual aircraft. This could be useful when the crew have to be trained on an aircraft that is not yet a part of the fleet (purchase in progress).
- It is possible to add multiple Approaches & Approach types into one SIM session.
Adding a New Trip
In OPS you can add a new trip regardless of section you work with: TABLE, CALENDAR, or TIMELINE.
Click the button NEW TRIP to add 1 or more legs. Select an aircraft, flight number (Leon assign it automatically if 'Default flight number' has been defined in fleet edition screen), date, STD, ADEP/ADES, STA. You can also add the PAX number or leave the trip as a ferry.
In section CALENDAR you can also add a new trip by right-clicking the mouse over the square.
Buttons UTC & LT allow switching between times while adding a new trip.
Flight time calculations
Leon suggests STA if a particular aircraft speed details are added in the fleet edition section, using GCD and/or average winds. STA suggestion can also be based on a minimum of 5 of the same historical routes.
Additionally, RouteFinder flight time calculations are available.
'RouteFinder' does not require separate integrations and is available by default in Leon.
'RouteFinder' calculates the flight times based on the routing.
In order to have the option available, the Include Route Finder time hint checkbox needs to be activated in the Flight editing section.
The flight time is calculated automatically and the dropdown suggests the block time value. It is based on the flight time calculation from the RouteFinder plus the taxi times from the Airport Directory.
'RouteFinder' also takes into consideration 'Exclusion zones' that can be set per Operator ('Sales Module' tab in 'General settings'), and the Fleet ('Sales' tab).
The winds database will allow for more accurate flight time calculations in OPS and SALES sections. The winds data is available here.
To add more legs to the trip click + and to delete a leg click ![]()
You can also add a new positioning, new office, or new reservation by clicking appropriate buttons placed next to NEW TRIP.
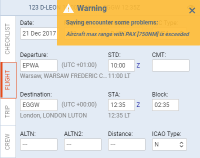
Aircraft max range alert
We have added an alert if the max range of the aircraft is exceeded.
In order to get the warning working you need to make sure that the following fields are filled in in the Fleet section:
- Capacity
- Max range with PAX
- Max range with 0 PAX
- Aircraft speeds
When adding a flight, Leon will show a max range alert if:
- field 'Distance' is filled in when adding a flight and higher than the max range for the aircraft in Fleet settings,
- field 'Distance' is left empty or 0 inserted. In this case, Leon will recalculate the time of the flight into the distance based on the four values listed above.
If the range is exceeded Leon will also mark the aircraft red in the OPS view.
Copying Trip
It is possible to copy the whole trip in the OPS sections.
In order to copy a trip you need to perform the following steps:
- Select the trip
- Click on the 'EDIT TRIP' button (bottom of the page)
- Click on the 'COPY TRIP' button in the 'Edit Trip' section
- Select the details that should be copied in the 'Copy Trip' pop-up window
- Once the 'COPY TRIP' button is clicked in the 'Copy Trip' window, the trip will be copied
As presented in the screen on the right-hand side, trip no 03-2022/97 was copied selecting the start date of the first leg on 17-03-2022 (new trip no 03-2022/103).
CAMO limits
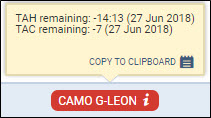
Once there has been an aircraft maintenance scheduled in Leon (described in THIS manual chapter) you can check CAMO limits when editing a trip in Table panel. Click ![]() and Leon will show one of the three CAMO limits messages:
and Leon will show one of the three CAMO limits messages:
 - TAH & TAC on the editing flight are ahead of the limits defined in Scheduled Maintenance section (and TAH & TAC warning margins defined in the aircraft profile have not been crossed).
Example: current TAH 450:00 TAC 150; Maintenance limits: TAH 480:00 TAC 165; warning margins: TAH 20:00 TAC 10
 - CAMO limits have crossed warning margins defined in the aircraft profile.
Example: current TAH 470:00 TAC 160; Maintenance limits: TAH 480:00 TAC 165; warning margins: TAH 20:00 TAC 10
 - CAMO limits have been exceeded.
Example: current TAH 482:00 TAC 167; Maintenance limits: TAH 480:00 TAC 165
You can check the exact TAH & TAC details when you hover the mouse over one of these three icons:
Flight documents
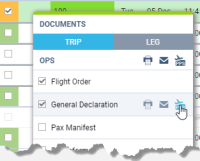
To print documents you need to mark particular leg/legs of the trip (in the checkbox) right-click of the mouse and select documents from the list.
Leon allows you to select different flights performed on the same aircraft - even if they are not on the same day - to the same 'Flight Order' or 'Trip Sheet'. The same applies to 'General Declaration' (if you tick i.e. 5 flights - 5 separate documents will get printed), 'Pax Manifest' or 'Pax Information'.
Tick flights in the first column on the left, right-click with the mouse (it does not matter where you point the mouse-arrow) and a pop-up window will show up. Select the documents and it will get printed.
If you select only one leg of a multiple-legged trip and right-click with the mouse, you will see 2 available buttons on top: TRIP and LEG. Select LEG to print documents for just that marked leg.
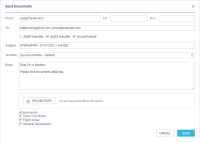
To send the documents to the crew assigned to a flight you simply click on the envelope icon next to the document you wish to send.
A pop-up window will open as per screenshot.
If you created the email template in the EMAIL TEMPLATES section, the CC, BCC emails, as well as the text, will be pre-populated. If there is more than one template created in the 'Email Templates' section, you can select the relevant one from the 'Templates' dropdown.
You can include ADEP/ADES Handler when sending the OPS/Sales/Custom documents. Handling agent has to be selected in the OPS checklist. If the Handling agent is not selected, the checkbox at the corresponding handler will be inactive. Additionally, the checkbox will be inactive if the selection includes positioning. The checkbox status is remembered by Leon.
Additionally, the documents can be sent to the 'Aircraft email'. This is the email inserted in the 'Fleet' sections > 'SALES' tab of edited aircraft details. The 'Aircraft email' is a BCC type email.
It is also possible to send the documents to CrewBriefing. More information can be found here.
Flight Order
Flight Order is an internal document generated for each trip required by CAA. In Leon, the format of this document can be customised. The Flight Order number looks like a date format, however, its number is a consecutive 'Flight Order' number issued in a particular month, i.e. 6-07-2013 means, that it is the 6th consecutive 'Flight Order' issued in July.
Flight Order patterns are available in Documents Manager panel - click ![]() select 'Flight Order' and view 1 of the 3 available templates. If you are happy with a particular one, insert the version and save. To publish it click the white dot.
select 'Flight Order' and view 1 of the 3 available templates. If you are happy with a particular one, insert the version and save. To publish it click the white dot.
General Declaration
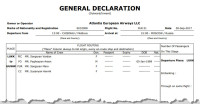
This document lists inbound and outbound flight details and crew names. It is being requested by the immigration authorities at some airports of arrival. The pattern of 'General Declaration' also includes 'Declaration of Health' with the space for notes and signatures along with the general declaration signature signed by PIC. The text can be modified upon request.
It is possible to have a General Declaration document including passengers details - go to a section Settings > Documents Manager, click 'New Template' and select one of the 5 available templates, including GenDec UK or GenDec US.
Crew Trip Sheet
This document includes basic information about the flight, which is important for the crew and must be acknowledged by the crew before the flight.
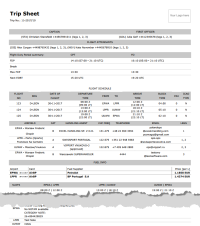
- Crew Trip Sheet - information such as: crew names & functions, FDP details, clients, registration marks and call signs of the aircraft, OPS contact data, flight schedule details, handling agents contact details, fuel info and overflight/landing permissions.
- Flight Service Notices - PAX names, passport numbers & expiry dates, nationality details. Information about PAX catering, transport, special requests, crew HOTAC, crew transport and additional info can also be included.
Pax Manifest
This document shows all PAX information including: name & surname, D.O.B., passport no. & expiry date, nationality. All these details need to be entered in the 'Pax Database' in the Phonebook before they can be further used in Leon.

If you add passengers information to Leon manually (which means you don't use Pax Database data added to Leon in the section 'Phonebook > Pax Database') it is still possible to view it on 'Pax Manifest document.
Go to Documents Setup and enable this option by ticking the “Show on Pax Manifest” checkbox (at the bottom of the page).
If you hover the mouse over the '?' the information will show up: 'Show pax list in the text mode on Pax Manifest document. Correct data has to be entered in the format: No. gender surname name date-of-birth passport no. passport expiry date nationality. Columns have to be separatedd by comma.'
The below example explains how it works.
- Add pax details in the 'Legs Info' section
1, Surname Name, DoB, Passport No, Date of Expiry, Country of Issue
for example:
1, Mr, Smith John, 01-01-2000, ABC1235786, 31-12-2020, U.K.
The gender will be displayed as:
- M if inserted as Mr
- F if inserted as Mrs, Miss or Ms
- CHD if inserted as Child
- INF if inserted as Infant
- Go to Flights List page - mark appropriate flight/flights in the 1st column, right-click of the mouse and select Pax Manifest document to get pax data.
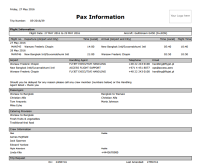
Pax Trip Sheet
Some operators require an extra document for their passengers with a brief information about the upcoming flight.
The document includes:
- Trip number
- Flight information: flight date and aircraft type & registration
- Airport information & schedule times
- Airport handling details: agents names & phone numbers
- Passengers details: for all sectors
- Catering provision
- Crew information: names, functions & contact phone numbers
If you are sending OPS documents Leon will automatically populate e-mail addresses of the Crew assigned to this flight. E-mails are taken from Work email in User Profile section. From email address is imported from work email of the person sending the documents.
Journey Log
In Leon you can add the Journey Log data in 2 ways:
- In the right-hand filter, tab FW & JL - here you can add data leg by leg, described in THIS CHAPTER of manual.
The 2nd way is useful if a trip has 2,3,4 or more legs, as Leon shows a Journey Log window for the entire trip, where you can easily enter post-flight data leg after leg. If you need more items to be displayed in your Journey Log you can add them in a section Settings > Flight Editing.
Flight times are mandatory to be inserted into the EDIT LOG panel for each leg, in order the trip Journey Log to be saved. If you have an option Allow not completed JL to be entered switched on in Settings section, you are able to save the Journey Log without fuel data (such input appears in the TABLE view as an orange dot, instead of green dot).
Trip changes history
To check all changes done in the trip you need to right-click with the mouse over a selected flight and click a link ![]() which opens a new window, where all changes are displayed.
which opens a new window, where all changes are displayed.
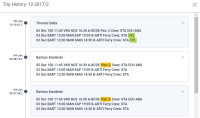
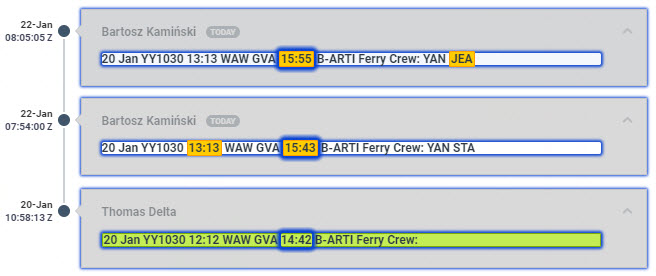
In the changes history window Leon shows chronological list of all changes (the latest on top). The colours indication shows added data in green, changed data in yellow and removed data in red.
When you click on the changed detail, Leon highlights previous entrances of the same detail. On the screenshot below you can see highlighted STA 15:55, then also 15:43 (previous STA) and 14:42 (initial STA).
If the flight has been deleted in Leon you can still check its history (as long as the option to keep deleted flights as crossed-out is enabled) in case you want to know who deleted it and when.
Sending documents to CrewBriefing in PPS
It is now possible to upload the documents to PPS directly from the Document Menu in the OPS.
It is possible to send:
- one particular document - by clicking on the 'PPS icon' next to the document
- batch of marked documents - by marking the documents you would like to send and clicking on the 'PPS icon' by the main section (OPS or SALES) in the document dropdown menu
The process of sending the documents is as follow:
- Open the 'Document Menu' in the OPS.
- Choose if you wish to send the documents per TRIP or per LEG.
- Choose the documents you would like to send.
- Click on the relevant 'PPS icon', depending on whether you wish to do that for 1 document or for the bunch.
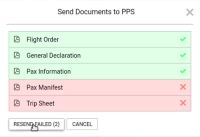
- A window will pop up with the chosen documents. Click on 'SEND' button in order to send. It might happen that some of the documents woulnd't send on the first attempt. In such case, simply click on 'RESEND FAILED' until all the documents are marked with the green tick.
- Once all send, you should be anle to view them in CrewBriefing in PPS. The documents sent form Leon are merged into a file generated for Crew in CrewBriefing page.
It also is possible to upload files for multiple trips. To do so simply mark the trips you would like to send the documents for, open the documents menu and click on the relevant 'PPS icon'. If some of the documents fail to upload, the window will display the message as per below

When sending documents to PPS you have an option between doing it for First Flight or Per Flight.
There are few scenarios possible of sending the documents to CrewBriefing:
- In LEG mode to First Flight - all the documents attached to first flight and each pdf generated per leg, number of pages within one pdf
- In TRIP mode to First Flight - all the documents attached to first flight and each pdf generated per trip
- In LEG mode and Per Flight - each document attached to the relevant flight and each pdf generated per leg
- In TRIP mode and Per Flight - exactly in the same way as in the LEG mode and Per Flight
After the documents are sent, in CrewBriefing, apart from the document type name, additionally, there is the routing indicated in the file name in CrewBriefing.
.
SLOT & ASM messages
GCR Messages
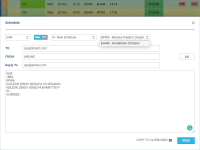
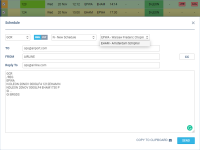
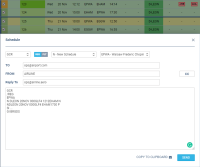
GCR messages (General Aviation Slot Clearance Request) allow to reserve slots at airports. They use internationally valid format described below. To send a GCR right-click on the flight and select SHOW SCHEDULE. In the drop-down box select GCR. The content window automatically displays the default information basing on the selected flight.
To send the message you need to add the recepient's email address in the TO section. In the FROM section you need to insert the LABEL and in Reply to section you insert the email where the replies should be sent to.
IMPORTANT!
GCR FORMAT:
GCR
/REG or /FLT - aircraft registration or flight number
EPWA - airport at which slots are being requested
N BARTI 02MAR 001F900 0800EPPO P - flight details: N (action code) BARTI (flight identification) 02MAR (date of operation) 001F900 (PAX number + Aircraft type) 0800EPPO (Origin airport (ICAO) + Scheduled Time of Arrival) P (type of flight)
SI … - (optional) additional information in free text
GI BRGDS - general information in free text
For an arrival slot, there is NO blank between the action code and the flight identification (NBARTI) . The scheduled time of arrival is stated AFTER the airport of origin, without a blank in between.
For a departure slot, there is A BLANK between the action code and the flight identification (N BARTI). The scheduled time of departure is stated BEFORE the destination airport, without a blank in between.
The action code defines the exact intention of the GCR message sender and is always at the beginning of the line. Depending on the sender, the following codes are possible: N– New Schedule; D– Delete Schedule; C– Schedule to be changed; R– Revised Schedule.
Flight types: D- General Aviation Flight; W- Military Flight; I- Air ambulance; P- Positioning/Ferry/Delivery/Demo Flight; H- Cargo Flight; T- Technical Flight; K- Training Flight; N- Other; if the box 'Commercial' is unticked the flight type will display D.
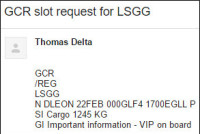
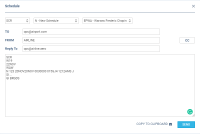
On the attached screenshots you can find examples of GCR messages.
- Flights on the same day - select the airport and Leon will show all flights from/to that airport.
- Flights on different days - Leon will show only flights on the next day, omitting the following days.
- Flights on the following day/days - when marking 2,3 days (or more) and selecting an airport, if flights are not on the first marked day but on the following day/days - Leon will show flights i.e. on the 2nd marked day omitting the 3rd marked day.
You can find an example of GCR message email in the screenshot on the right-hand side.
If the format of the GCR message is invalid, Leon will highlight the content in red and will show a warning: GCR message has invalid format, probably header or footer mismatched.
The default message content can be inserted manually, however, the format still applies.
SCR Messages
Format SCR (Slot Clearance Request/ Response) can be used by right-clicking with the mouse and selecting SHOW SCHEDULE. When a pop-up window appears, you can change the format from 'Plain Text' to SCR.
The message must be in the format as on the screenshot - it can not be customized.
EXAMPLE
SCR (type of request)
W17 (indication of season)
21DEC (date of the day)
LTN (Airport at which slots are being requested)
N MAN123 21DEC21DEC 0000500 011GJ4 1400WAW C (flight details, see explanation below)
N - action code; MAN123 - flight number; 21DEC21DEC 0000500 - date & day of flight; 011GJ4 - capacity + aircraft type; 1400WAW - origin of flight (IATA) + scheduled timem of arrival; C - type of flight (available types in Leon as below)
- W - Military - type ICAO 'M' in Leon
- I - Ambulance Flight - type 'Ambulance' in Leon
- T - Technical Test - type 'Technical' in Leon
- K - Training Flights - type 'Training' in Leon
- P - Positioning Flights – Non Revenue (ferry/delivery/demo) - flight 'Ferry' in Leon
- J - Scheduled – Passenger Normal Service - type ICAO 'S' & trip type 'Regular PAX transport' in Leon
- F - Scheduled – Cargo and/or Mail - type ICAO 'S' & trip type 'Cargo' in Leon
- H - Charter – Cargo and/or Mail - type ICAO 'N' & trip type 'Cargo' in Leon
- C - Charter – Passenger only - all other types
SI - free text GI BRGDS - free text
A flight number combines a maximum of 7 letters and digits (2-3 letters followed by 1-4 digits with an optional letter as a suffix)
It is possible to change type of the action by selecting an appropriate option from the drop-down box:
- N - New Schedule
- D - Delete Schedule
- C - Schedule to be changed
- R - Revised Schedule
- A - Accept an offer
- P - Accept an offer with pending request time
- Z - Decline an offer
Another drop-down box allows to select between airports.
IATA schedules seasons – there are two seasons: Summer(S) and Winter (W). The season changes when the clocks change in Europe between daylight savings time and standard time.
• Summer starts on the last Sunday in March through to the Saturday of the last weekend in October
• Winter starts on the last Sunday in October through to the Saturday of the last weekend in March
ASM messages
It is now possible to send Ad Hoc Schedules Message (ASM) from 'Show Schedule' section in Leon.
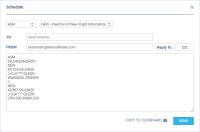
In order to send the message, you need to go to 'Show Schedule' option in the Documents Menu in OPS view and switch the option from 'Plain Text' to 'ASM' in the top-left dropdown.
'ASM' message email option will populate. Currently, there are 3 options available:
- NEW - Insertion of New Flight Information - used to send the information about the new flights
- CNL - Cancellation - used to send the information about cancelled flights
- RPL - Replacement of Existing Flight Information - used to send the information about changes on the flights
DCS & PSS systems.
SSIM (Standard Schedules Information Manual) panel in Leon (available in Settings), allows to send ASM (Adhoc Scheduled Message) messages to DCS (Departure Control System) & PSS (Passenger Service System) from a section OPS.
The 1st step to make it work is adding default email addresses in Settings > SSIM panel.
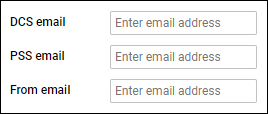
The 2nd step is sending ASM message to DCT & PSS systems from the checklist section of the panel OPS.
Each operator has 2 checklist items DCS & PSS available in the Settings > Flight Editing > OPS Checklist Items section. The items are not marked, so either need to be marked to appear on each single flight, or added from 'ADD ITEM' panel of the checklist in OPS section. Once added, they will appear with the SEND button.

Sending ASM messages to DCS & PSS
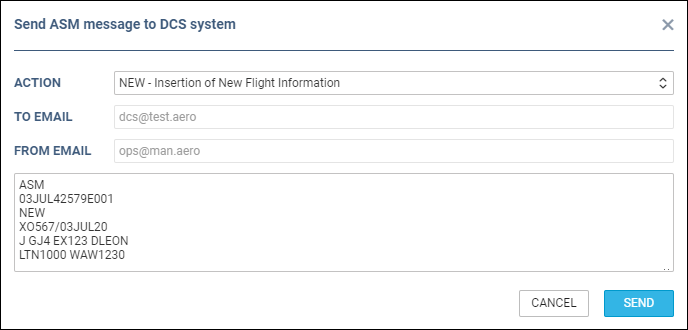
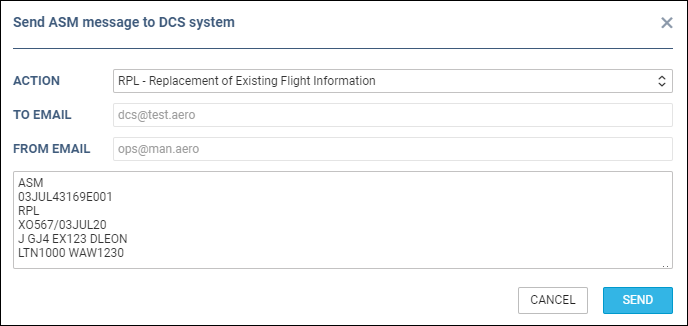
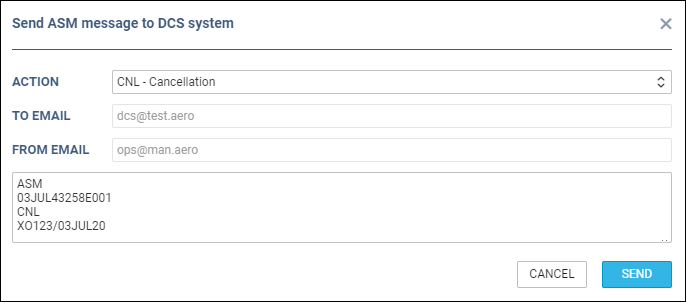
By clicking SEND button for DCS or PSS item, Leon shows a new pop-up window, which shows pre-defined message. Leon shows 3 types of messages in formats as on screenshots below (formats are the same for DCS & PSS systems). If no default email address has been added in Settings > SSIM, Leon will show a warning information: “DCS/PSS or 'From' email is not set”.
1. NEW - Insertion of New Flight Information - displayed when sending ASM message for the new flight.
2. RPL - Replacement of Exisitng Flight Information - displayed when re-sending ASM message to DCS.
3. CNL - Cancellation - displayed when a flight has been deleted.
Once ASM message has been sent out, Leon will change the checklist item's status automatically to 'Sent'. If the schedule was changed or a flight has been deleted, the DCS or PSS item's status will turn to '?'
IATA SERVICE TYPE
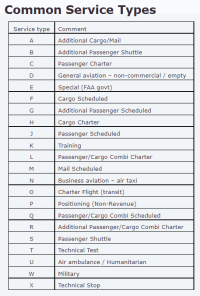
It is possible to include IATA Service Type when sending ASM or SSIM messages from Leon.
The 1st step is to enable this functionality by marking a checkbox  in the Admin panel, section 'Flight Editing'. In the same section it's possible to define a default IATA Service type
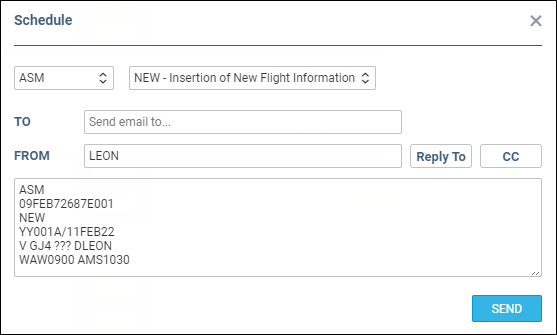
All available IATA Service types are explained in the screenshot on the right.
When enabled, the IATA Service type will show for each flight in the 'OPS' panel, tab 'FLIGHT'- it can be manually changed if necessary.

It also shows in the panel SCHED (when creating or modifying the schedule).

The main section where the IATA Service type will be especially useful is sending the ASM message window from the SHOW SCHEDULE panel.
Integrations
Leon is integrated with numerous partners in order to automate the process of data exchange.
Leon can send your empty legs and aircraft avalibility to different online platforms allowing to reach more customers for your charter flights. We have partnered with: Avinode, AviMall, Charterpad, Execflyer, FlightPartner, Hellojet, JetHunter, Jetsmarter, Migacore, PrivateFly, Returnjet, Victor, Stratajet.
Leon can export flight data for further flight preparation. There are multiple Flight Support companies using Leon for daily flight preparation so if you have Leon, it is easy to outsource your dispatch entirely to one of them.
We are also integrated with PPS Flight Planning, ForeFlight, and RocketRoute.
We are integrated with IFS (International Flight Support), which allows to automatically log flight figures into post flight database in Leon.
Pilots can export their flights into logbook software: MccSuppoort or Coradine.
Leon can export post flight data to CAMP (airframe, engines and APU) for further maintenance tracking in CAMP.
Import of movements can be automatically imported into flight watch module from Eurocontrol.
You can order various services within Leon like handling, catering or fuel through MyHandling, Delisky or UVair softwares.
Leon is also integrated with AC-U-KWIK - worldwide airport and FBO / Handler data.
An on-line quoting & scheduling can be done with a help of SchedAero, also integrated with Leon.
See also:


